How to Wash Youth Goalie Gloves: Keep Grip Like New

As an Amazon Associate, I earn from qualifying purchases. This means that if you click on certain links on this site and make a purchase, I may earn a small commission at no extra cost to you.
Why Washing Youth Goalie Gloves the Right Way Actually Matters
Knowing how to wash youth goalie gloves properly is one of the most overlooked parts of goalkeeper equipment care — and one of the most expensive mistakes to ignore.
Your child just finished a muddy Sunday match. The gloves are caked in dirt, the latex is damp, and they get tossed straight into the kit bag — or worse, left balled up in the back seat of the car. Sound familiar?
It is one of the most common mistakes youth soccer parents and young goalkeepers make. And it is silently destroying a piece of equipment that was not cheap to buy in the first place.
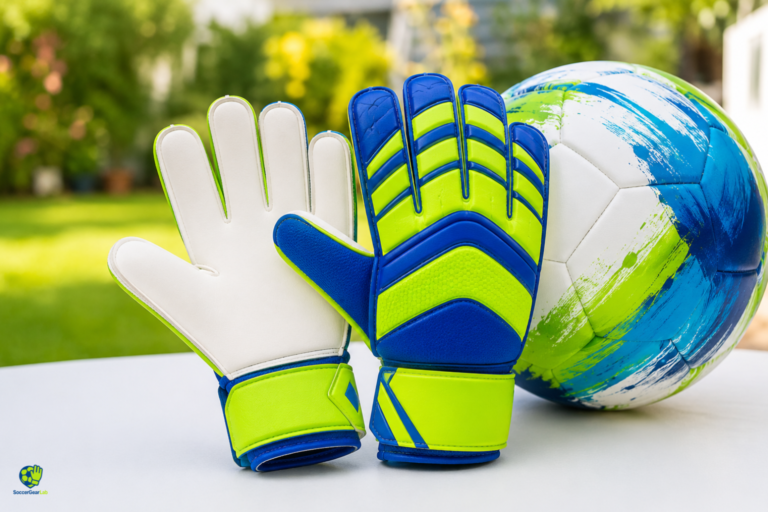
Goalie gloves are not like shin guards or cleats. The latex palm that makes them grip the ball so effectively is also delicate, sensitive to heat, and quick to deteriorate when treated carelessly. A quality pair of youth goalie gloves that should last a full season can be reduced to a cracked, peeling mess within a few weeks if they are not properly washed and cared for.
The good news is that washing and maintaining goalkeeper gloves is not complicated. It takes just a few minutes after each use, costs nothing extra, and can dramatically extend the life and performance of your gloves. This guide walks you through everything — from the right way to wash them after a game, to how to store them, dry them, and keep them performing at their best all season long.
Whether you are a parent managing your child’s soccer kit or a young goalkeeper taking ownership of your own equipment, this guide gives you everything you need.
Why Proper Glove Care Matters
Before getting into the actual cleaning process, it helps to understand why glove care matters in the first place. A lot of parents and young goalkeepers are surprised by how fast gloves can wear out when they’re never cleaned properly. Dirt, sweat, and dry latex slowly kill the grip over time, even if the gloves still look fine on the outside.
The latex palm is the heart of a goalkeeper glove. It is a foam-based material engineered to grip the ball, absorb impact, and provide feel. But latex is also porous and sensitive. When dirt, grit, and sweat build up in the pores of the latex, the grip degrades noticeably. A glove that once stuck to the ball confidently starts to feel slippery and unreliable. especially compared to a fresh pair of best youth goalie gloves designed for maximum grip and control.
Heat is another major enemy. Latex left near a radiator, in a hot car, or tumbled in a dryer will harden, crack, and lose its elasticity rapidly. Once latex cracks, there is no fixing it — the glove is effectively finished.
Moisture management matters too. Gloves left wet and balled up in a bag are a breeding ground for bacteria and mold, which breaks down both the latex and the fabric backing of the glove, creating unpleasant odors and structural damage over time.
Proper care addresses all of these issues. It keeps the latex clean and porous, the material supple and flexible, and the glove smelling fresh. In practical terms, this means a glove that grips better for longer and protects your child’s hands more effectively throughout the season.
What You Will Need
You don’t need any specialist products to care for goalkeeper gloves properly. Here is everything required:
Clean lukewarm water is the primary cleaning agent. Not hot, not cold — lukewarm is ideal because it cleans effectively without stressing the latex.
Mild soap or a dedicated glove wash can be used for deeper cleaning when needed. A small drop of gentle dish soap or baby shampoo works well. Some brands produce specialist goalkeeper glove wash, which is worth considering if your child trains frequently.
A soft cloth or sponge helps remove stubborn dirt without scratching or abrading the latex surface.
A clean dry towel is useful for gently pressing excess moisture out of the gloves after washing.
Newspaper or a clean cloth can be stuffed inside the gloves while they dry to help them retain their shape.
A breathable mesh bag or glove bag is ideal for storage and transportation.
Optional but recommended: a latex conditioner or Glove Grip spray helps restore suppleness to aging latex and can extend the life of a well-used pair of gloves significantly.
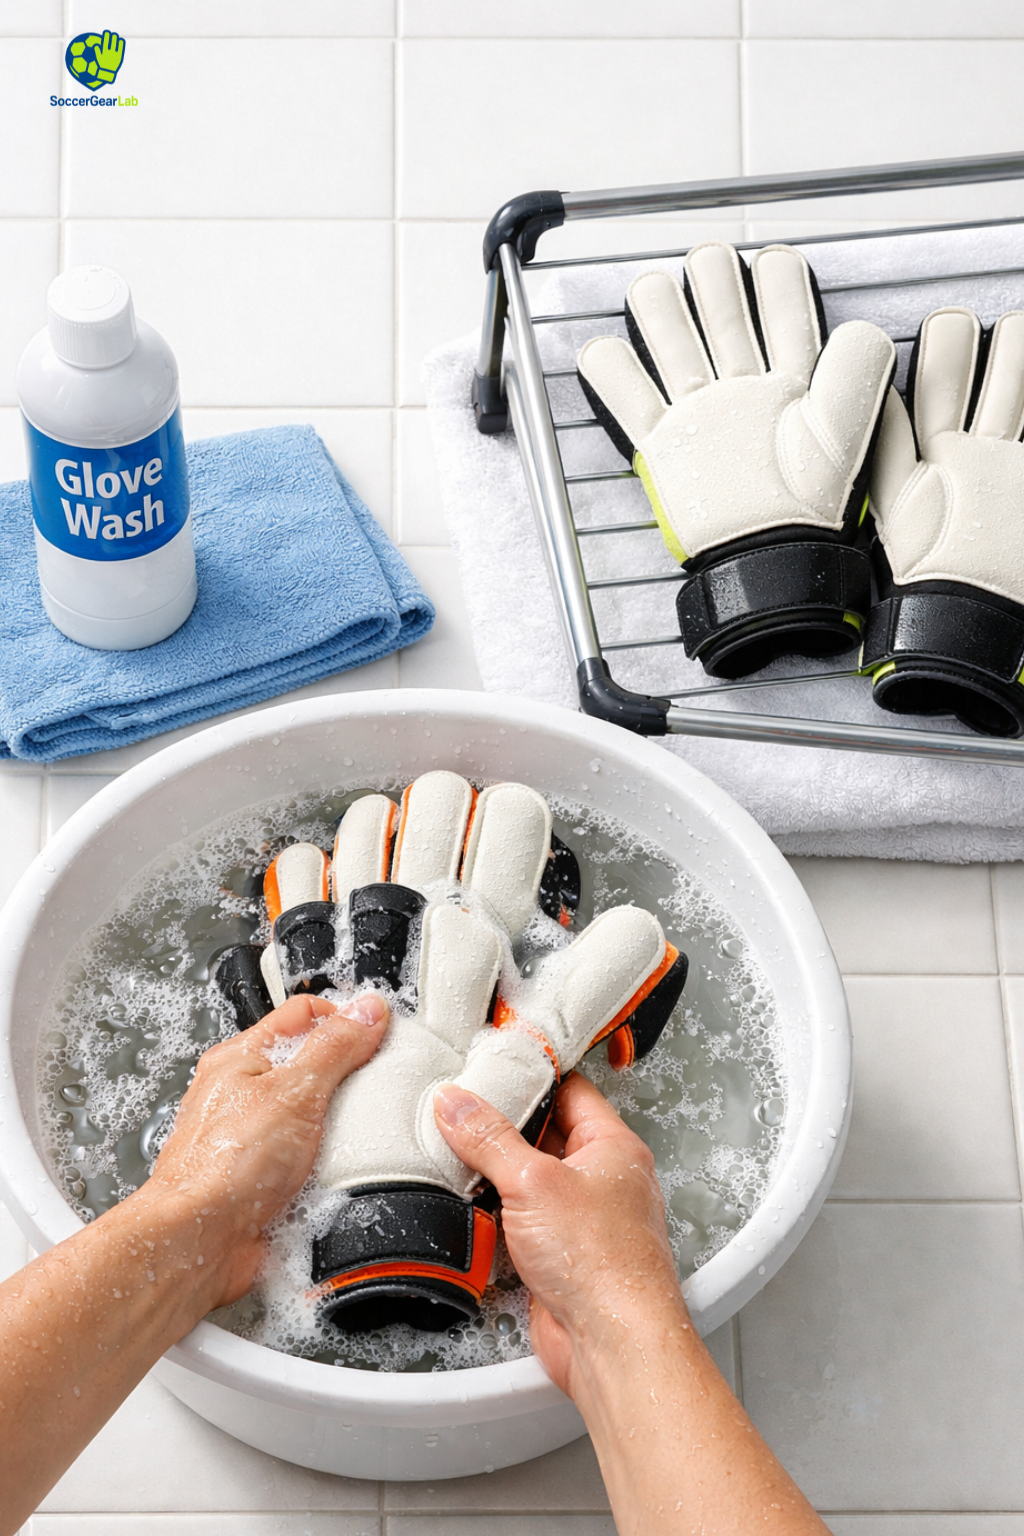
Step-by-Step: How to Wash Youth Goalie Gloves
Follow these steps after every training session and match for the best results.
Step 1 — Remove Excess Dirt Immediately
As soon as possible after use, gently brush or shake off any loose mud, grass, or debris from the gloves. Do this before the dirt dries and sets into the latex. Dried mud that has hardened into the pores of the latex is much harder to remove without damaging the surface.
Do not bang the soccer gloves together or scrub them aggressively at this stage. The goal is simply to remove the loose surface material before washing.
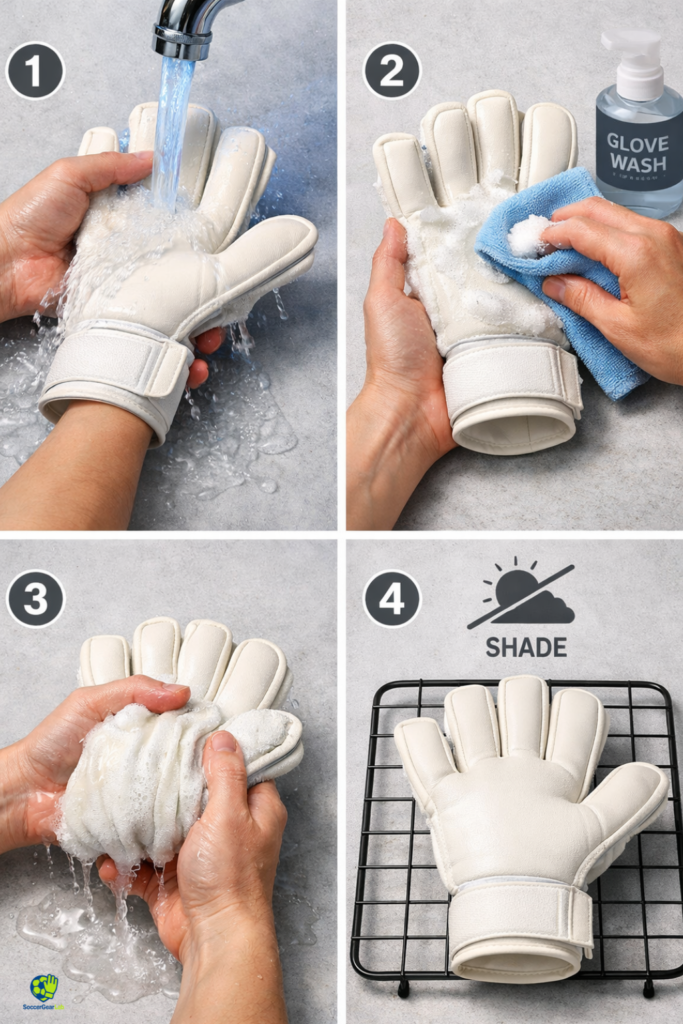
Step 2 — Rinse Under Lukewarm Running Water
Hold the gloves under a gentle stream of lukewarm running water, palms facing up. Allow the water to run over the latex surface and carry away the remaining dirt. Use your fingers to gently work the water into the palm, paying attention to any areas where dirt has accumulated.
Never use hot water. Hot water breaks down the latex at a molecular level, causing it to harden and crack over time. Cold water is less effective at loosening oils and organic matter. Lukewarm is the ideal temperature — roughly the same temperature as a comfortable hand wash.
Step 3 — Apply Mild Soap if Needed
For gloves that are particularly dirty or smelly, apply a very small amount of mild soap or specialist glove wash to the palm. Work it gently into the latex with your fingertips in small circular motions. Pay attention to the finger gussets and any seams where dirt accumulates.
Do not use household detergents, bleach, or any harsh chemical cleaning products. These will strip the latex of its natural oils and grip properties, leaving it dry, stiff, and ineffective. Baby shampoo, mild dish soap, or a dedicated goalkeeper glove wash are the only appropriate cleaning agents.
Step 4 — Rinse Thoroughly
Rinse the gloves under lukewarm running water until all traces of soap are completely gone. Soap residue left in the latex will reduce grip and attract more dirt during the next use. Rinse longer than you think is necessary — especially in the seams and along the finger channels where soap tends to hide.
Step 5 — Gently Press Out Excess Water
Once the gloves are clean and fully rinsed, gently press — never wring or twist — the excess water out of the gloves. Wringing the gloves puts unnecessary stress on the seams and can cause the latex to tear or separate from the backing material.
Lay the gloves flat on a clean dry towel and gently roll the towel around them, applying light pressure to absorb the surface moisture. This leaves the gloves damp but not dripping, which is the ideal state for drying.
Step 6 — Reshape and Stuff
Before setting the gloves aside to dry, reshape them by hand so they maintain their natural form. Stuff the inside lightly with a small amount of crumpled newspaper or a clean soft cloth. This helps the gloves hold their shape as they dry, preventing them from curling, flattening, or stiffening into an unnatural position.
Step 7 — Air Dry at Room Temperature
Place the gloves in a well-ventilated area at room temperature, away from direct sunlight, radiators, heat vents, or any other heat source. Leave them to dry naturally. Depending on the humidity of the environment, this typically takes between four and twelve hours.
Never use a hairdryer, tumble dryer, or any direct heat source to speed up drying. Even brief exposure to high heat will permanently damage the latex. Patience is essential — rushing the drying process is one of the most common ways goalkeeper gloves are ruined.
How to Dry Goalkeeper Gloves Correctly
Drying is where many parents and young players go wrong. The temptation to speed things up — especially when gloves are needed again the next day — is understandable. But the consequences of improper drying are severe and irreversible.
The single most important rule is to keep gloves away from heat. This cannot be overstated. Radiators, tumble dryers, car dashboards in summer, direct sunlight through a window — all of these will cause the latex to harden, shrink, and crack. Once this happens, no amount of conditioning or care can reverse the damage.
The correct approach is to lay the gloves flat or hang them loosely in a cool, well-ventilated indoor space. A laundry rack or the back of a chair in a room with good air circulation works perfectly. If the gloves need to be used again quickly, placing them near (but not directly over) a fan can help speed up drying without applying damaging heat.
In humid climates or during winter months when indoor air is less circulating, drying may take longer. Plan ahead and wash gloves the evening before a training session or match day rather than the morning of, to ensure they are properly dry before use.
How to Store youth goalie Gloves
Proper storage is just as important as proper washing. Even clean, well-dried gloves can deteriorate quickly if stored incorrectly.
The ideal storage environment is cool, dry, and well-ventilated. A breathable mesh bag or an open glove bag is perfect. Avoid storing gloves in a sealed plastic bag or an airtight container — without air circulation, moisture becomes trapped, leading to mold growth and latex breakdown.
Keep the gloves away from direct sunlight during storage. UV radiation degrades latex over time, even when gloves are not being used. A drawer, a shelf in a cool room, or a dedicated compartment in a breathable sports bag are all suitable options.
Never store goalkeeper gloves at the bottom of a heavy kit bag where they will be compressed under other equipment. The weight and pressure can deform the shape of the gloves and damage the padding in the backhand.
If gloves are being stored for an extended period — for example, at the end of a season — clean them thoroughly first, allow them to dry completely, and consider applying a light coat of latex conditioner before storing. This keeps the latex supple during the inactive period and prevents it from drying out.
How to Activate youth goalie Gloves Before Use
This is a step that many youth goalkeepers skip entirely — and it makes a noticeable difference to performance.
Latex grip is significantly better when slightly damp. Before every training session or match, dampen the palm of each glove with a small amount of water. You can use a water bottle to apply a light spray, dip the palms briefly in a bucket of water, or simply lick the palms as many professional goalkeepers do.
This pre-match activation immediately improves the tackiness of the latex, allowing it to grip the ball more effectively from the very first catch or save. Dry latex has noticeably less grip — a fact that becomes particularly obvious in warm, dry weather when gloves that haven’t been dampened can feel almost slippery.
Make pre-game glove dampening a consistent part of your child’s pre-match routine, alongside putting on shin guards and lacing up boots. It takes five seconds and makes a genuine, measurable difference.
How to Extend the Life of Youth Goalie Gloves
Beyond the basic wash-and-dry routine, there are several habits and practices that can significantly extend the useful lifespan of a pair of goalkeeper gloves.
Using separate gloves for training and matches is the single most effective strategy. Match gloves use the softest, most grippy latex available, but that softness comes at the cost of durability. Using expensive match gloves for every training session on artificial turf will destroy the latex in weeks. Invest in a more durable pair of training gloves for daily practice and reserve the match gloves strictly for game days. Over a full season, this approach can make match gloves last two to three times longer.
Avoiding artificial turf with match gloves is a related point. Artificial grass surfaces are highly abrasive and wear down soft latex far faster than natural grass. If your child trains on 3G or 4G artificial turf, a training glove with harder, more durable latex is essential.
Rotating between two pairs even of the same type gives each pair recovery time between uses. Latex that has time to breathe and recover its structure between sessions tends to last longer than latex that is used every day without rest.
Applying latex conditioner periodically helps restore moisture and flexibility to aging latex. A small amount of specialist conditioner massaged gently into the palm every few weeks keeps the latex supple and can visibly improve the grip of older gloves. Some goalkeepers also use a very small amount of petroleum jelly for this purpose, though dedicated products work better.
Washing gloves promptly after every use prevents dirt from embedding itself in the latex pores. Gloves left dirty overnight are significantly harder to clean the following day and suffer more damage in the process.
Signs That Gloves Need Replacing
Even with perfect care, youth goalie gloves do not last forever. Knowing when to replace them is important for both performance and safety.
Peeling or cracking latex is the clearest sign that a glove has reached the end of its useful life. Once the latex begins to peel away from the backing, the grip is gone and the glove can no longer protect the hand effectively.
Worn-through patches on the palm, particularly in the high-contact areas around the thumb and index finger, indicate that the latex has been completely used up in those zones. A palm with worn-through patches is a palm that can no longer grip the ball reliably.
Broken or bent finger spines that no longer sit correctly in the finger channels provide no protection and can actually cause discomfort or injury. If the spine system is compromised, the glove should be replaced.
A stretched, torn, or non-fastening cuff that no longer holds the glove securely on the wrist is both a performance and a safety issue. A loose glove can shift during a save, reducing grip and increasing the risk of hand injury.
Persistent unpleasant odor that doesn’t improve after thorough washing indicates bacteria or mold has embedded itself in the glove material. This is both unhygienic and a sign of material breakdown.
Special Care Situations
Caring for Gloves in Winter
Cold weather brings specific challenges for goalkeeper gloves. Low temperatures make latex stiffer and less grippy. In very cold conditions, keep gloves warm before the match — storing them in an inside jacket pocket on the way to the game helps maintain latex temperature. Some goalkeepers briefly soak their gloves in slightly warmer water before cold-weather games to bring the latex up to a more responsive temperature.
Caring for Gloves in Very Hot Weather
Extreme heat is the enemy of latex. In hot, dry conditions, gloves dry out faster and the latex can become overly dry and less grippy. Wet gloves more frequently during hot games and training sessions, and be especially careful to store gloves away from hot surfaces — never leave them on a car dashboard or in a bag in direct sunlight.
Caring for Gloves After Muddy Conditions
After particularly muddy sessions, the standard washing process may need to be repeated twice to fully remove embedded mud. Allow the first wash to loosen the bulk of the mud, then rinse, inspect, and wash again if necessary. Pay particular attention to the finger gussets and seams, which trap mud most readily.
Caring for Gloves Used on Artificial Turf
Artificial turf is highly abrasive and releases rubber crumb granules that embed in latex. After training on artificial turf, soak the gloves briefly in lukewarm water before washing — this helps loosen the rubber crumb particles. Use a soft cloth or sponge to gently work the particles free from the latex surface before rinsing.
A routine this careful deserves a product worthy of it. Not every goalkeeper glove wash protects latex the way it should — our [Youth Goalie Gloves: 5 Best Wash Products for Better Grip] cuts through the noise and points you to the ones that genuinely do.
Final thoughts
Taking care of youth soccer goalie gloves is one of those small habits that pays back far more than it costs in time and effort. A five-minute wash-and-dry routine after every session keeps the latex clean, grippy, and supple. Proper storage preserves the glove’s structure between uses. Smart habits like using separate training and match gloves, dampening before play, and avoiding heat at every stage all add up to gloves that last longer, perform better, and protect your child’s hands more effectively.
For young goalkeepers, learning to take care of their equipment is also part of developing a professional mindset — a sense of ownership and responsibility that extends naturally onto the field. A goalkeeper who respects their gloves is a goalkeeper who respects their craft.
Invest a few minutes in care after every session. Your gloves — and your performance — will thank you.
FAQs
Q: How often should youth goalkeeper gloves be washed? Goalkeeper gloves should be rinsed after every single use — training sessions included. A more thorough wash with mild soap should be done after every match or whenever the gloves are particularly dirty. Regular rinsing after training prevents dirt from building up and keeps the latex performing well throughout the week.
Q: My child’s gloves smell bad even after washing. What should I do? Persistent odor usually indicates bacteria has established itself in the glove material. Try soaking the gloves briefly in a mixture of lukewarm water and a small amount of white vinegar, then washing as normal. Baking soda applied to the interior of the glove and left overnight can also help neutralize odors. If the smell persists after multiple treatments, the gloves may be past their useful life and should be replaced.
Q: How do I remove dried mud from goalkeeper gloves without damaging them? Soak the dried mud area in lukewarm water for a few minutes to rehydrate and loosen it, then gently work it free with your fingertips or a very soft cloth. Never use a brush with stiff bristles, as this will scratch and abrade the latex surface. Patience and gentle pressure are key.
Q: Is it worth buying a specialist glove wash product? For a serious young goalkeeper who trains multiple times per week, yes — a specialist glove wash is worth the small investment. These products are pH-balanced for latex, clean more effectively than generic soap, and often contain conditioning agents that help maintain grip. For occasional recreational players, mild dish soap or baby shampoo is perfectly adequate.
Q: My child’s gloves are losing grip even though they look fine. Why? Grip loss without visible damage is almost always caused by dirt embedded in the latex pores, soap residue from a previous wash, or latex that has dried out. Try a thorough wash to clear any embedded dirt, ensure all soap is completely rinsed out, and dampen the palms well before the next use. If the grip still doesn’t recover, the latex may simply be nearing the end of its lifespan.
Q: Can I repair torn or peeling latex on goalkeeper gloves? Minor peeling at the edges of the palm can sometimes be managed temporarily with specialist latex glue, which is available from some goalkeeper equipment retailers. However, this is only a short-term fix. Once the latex has begun to peel or tear significantly, the grip and protection of the glove are compromised and replacement is the safest and most practical option.